
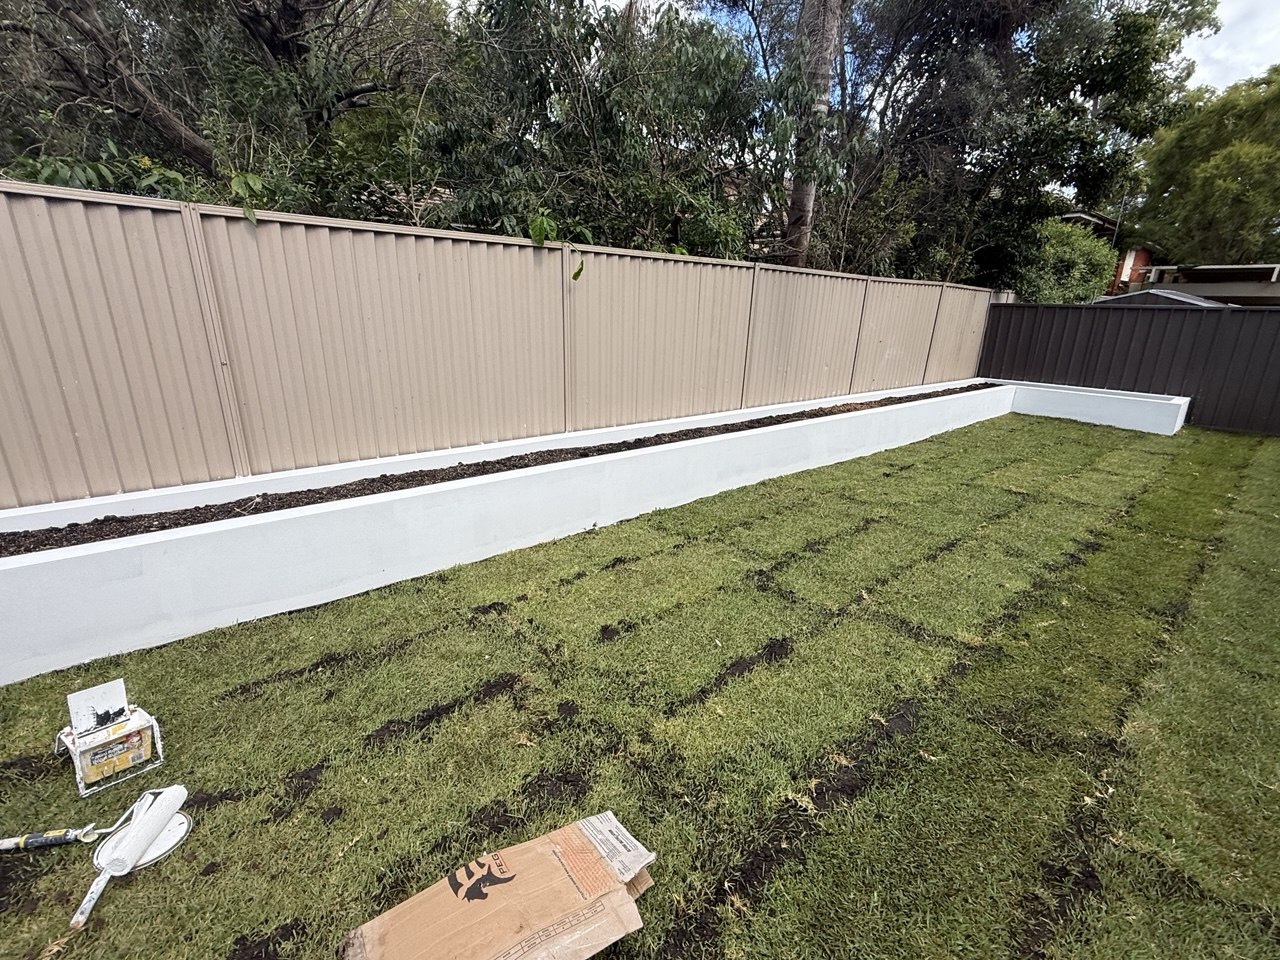
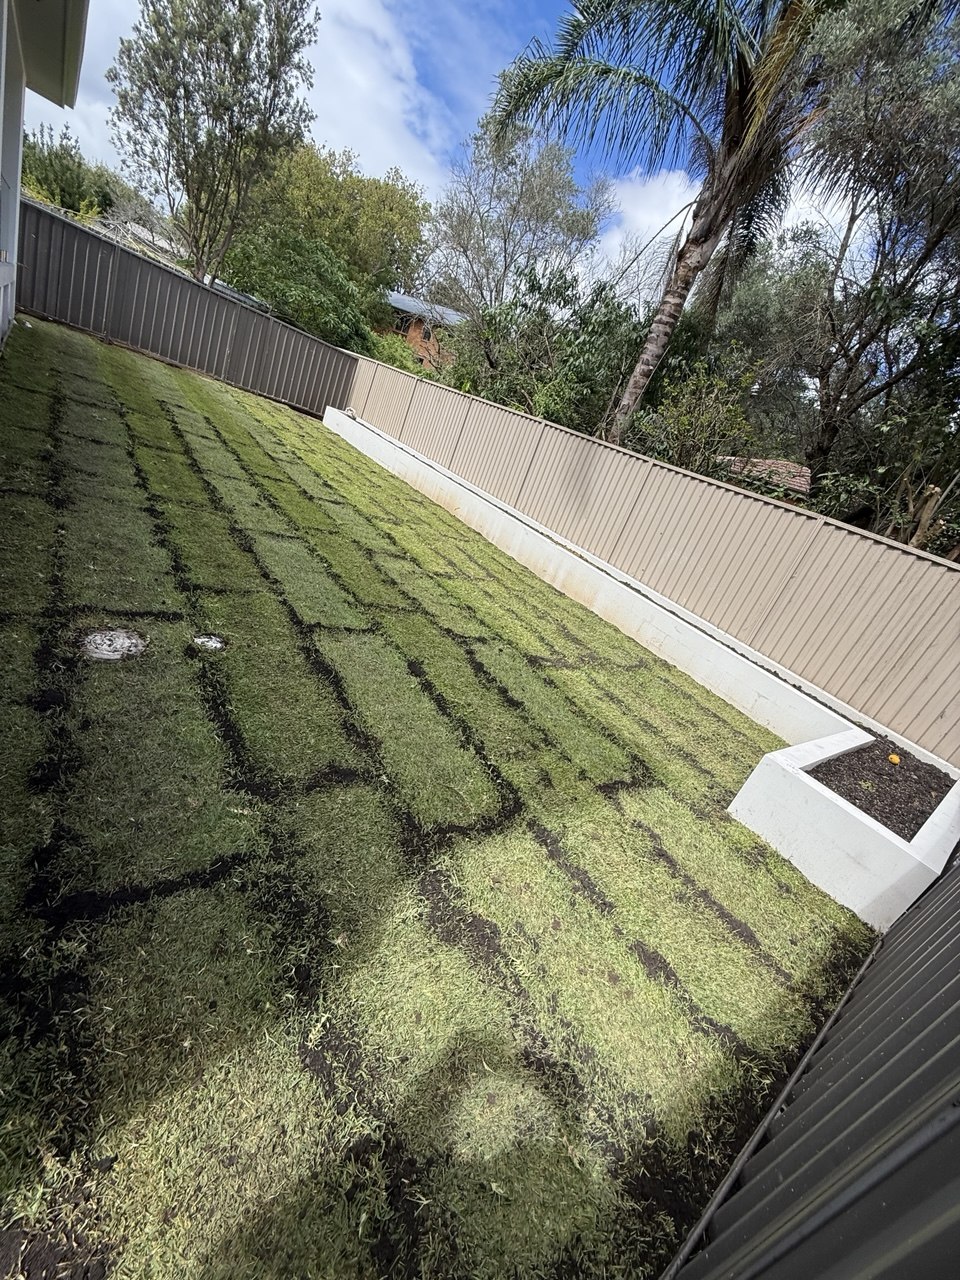
15 metres of rendered garden boxes built for a newly finished home in Eastwood — matched to the white render on the house, and planted out with lilly pilly to green up the Colorbond fence behind.
The brief
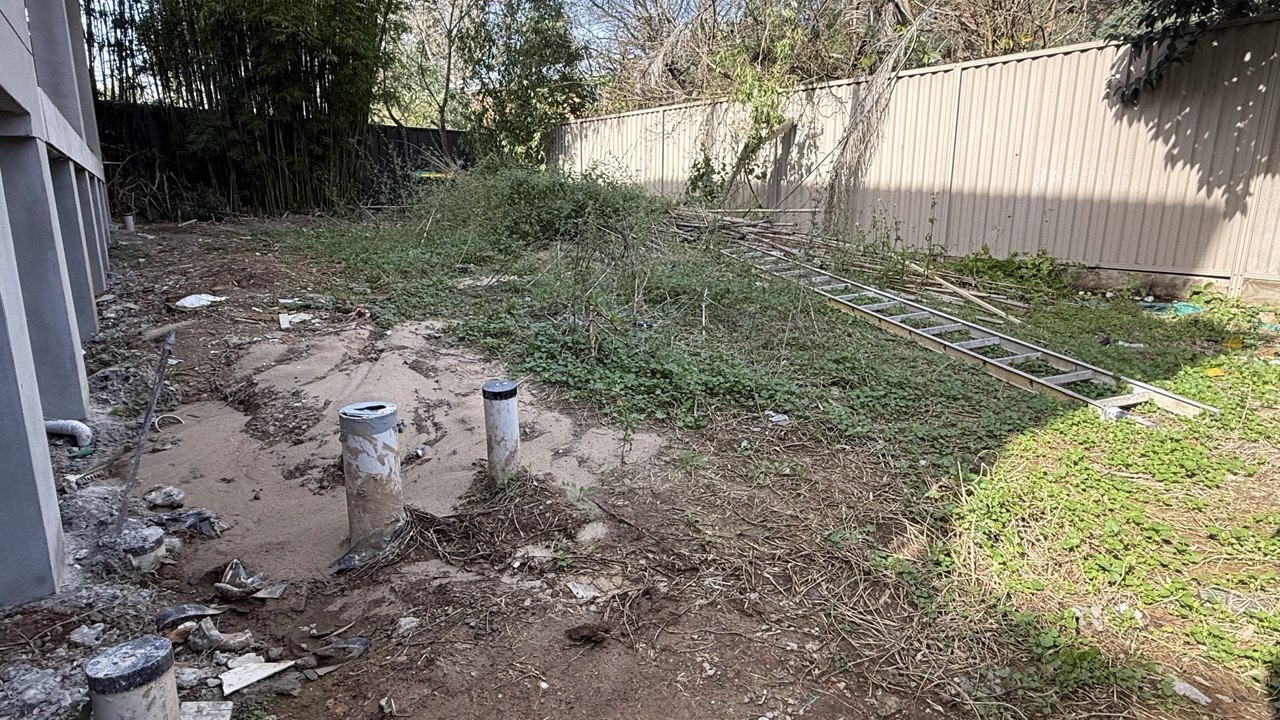
The house was brand new and finished to a high standard. The backyard wasn’t. It was bare dirt and weeds, with stormwater risers still sticking out of the ground and nothing else in it — no beds, no structure, nothing worth looking at from inside the house.
The owners weren’t after a full landscape. They wanted one thing done properly: garden boxes that looked like they belonged to the house rather than something added on afterwards.
The house is white rendered, which made the decision easy. Build the boxes the way the house is built, finish them the way the house is finished, and they read as part of the property instead of a separate feature.
How we built them
The build-up, step by step
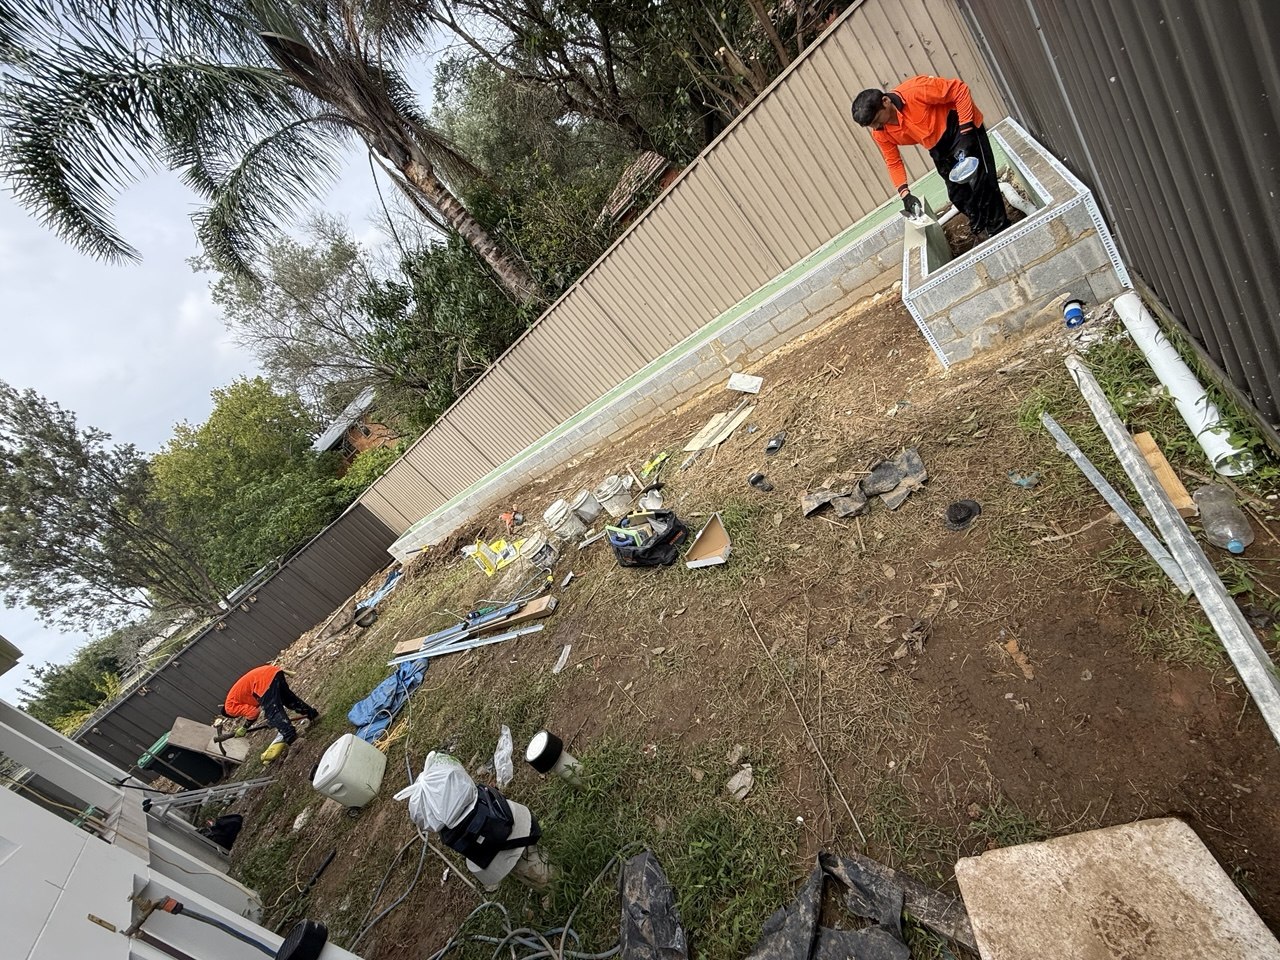
- Concrete block core. The boxes are blockwork, not timber and not a veneer. That’s what everything else depends on.
- Reinforced and core-filled. Steel through the cores, then filled solid with concrete. The whole run becomes one rigid structure rather than a stack of blocks.
- Polyurethane waterproofing to the back face. A flexible membrane between the wet soil and the blockwork, applied before anything gets backfilled.
- Drainage line through the box. Installed as part of the build, before any filling. Raised beds hold a lot of wet soil and the water has to go somewhere.
- High-quality acrylic render. Acrylic rather than a straight cement render — it has some flex in it, which matters outdoors.
- Dulux Weathershield. Painted to match the house, in a proper exterior product rather than whatever was on the shelf.
- Filled and planted. Garden mix in, then lilly pilly along the run.
Why rendered garden boxes crack — and why these won’t
This is worth explaining, because it’s the thing that goes wrong with rendered planters and it’s usually invisible until it isn’t.
A garden box holds wet soil against the back of a wall permanently. Not occasionally — permanently. If the wall behind the render can move even slightly, or if water has nowhere to escape, you get hairline cracks first, then staining bleeding through the paint, then render letting go in sheets. Plenty of rendered planters look terrible within two or three years for exactly this reason.
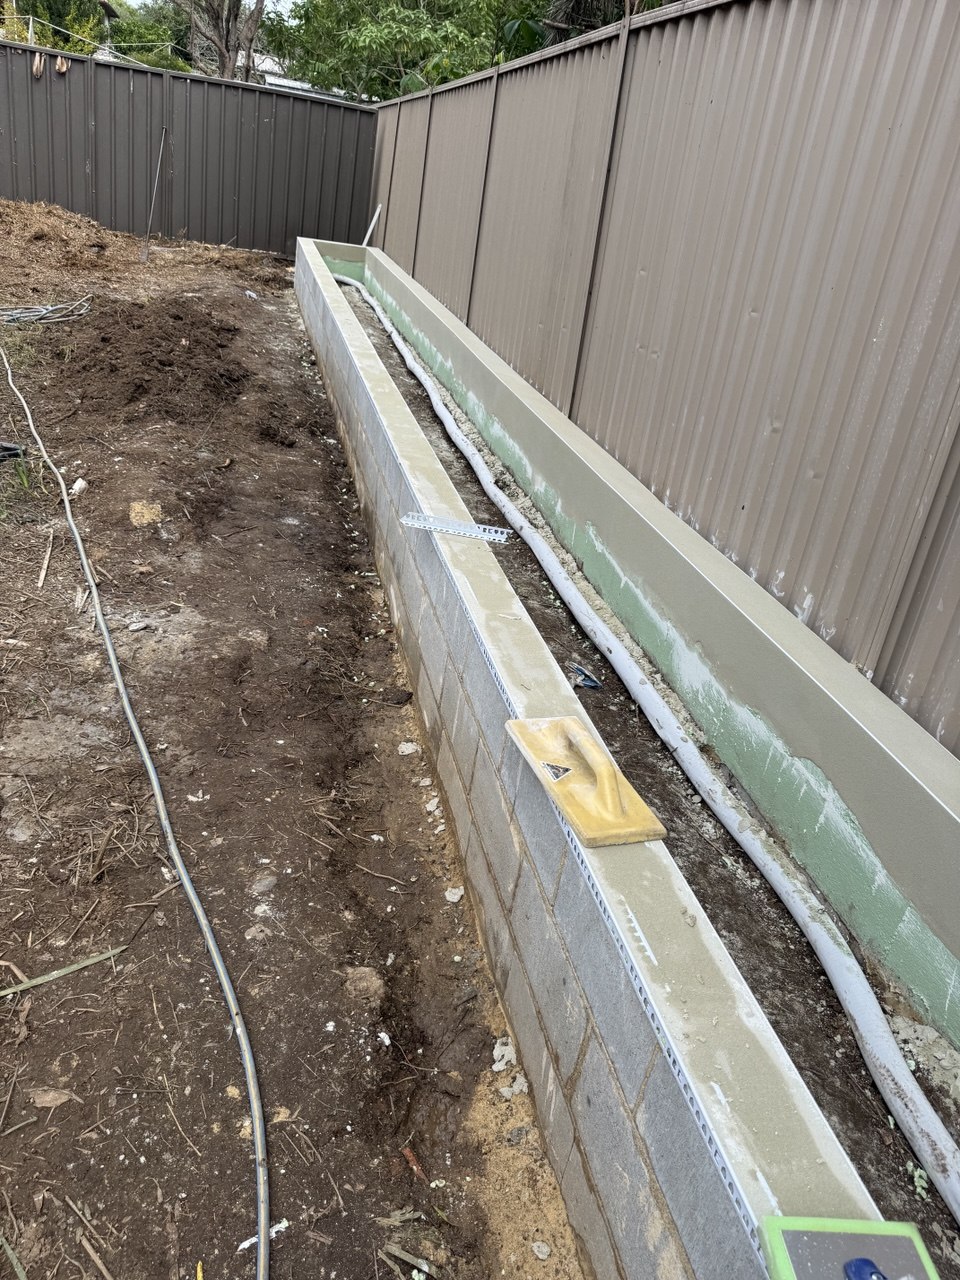
Three things prevent it, and all of them happen before anyone sees a finished wall:
The structure can’t move. Reinforcing steel through the block cores and filling them solid turns the run into one continuous piece of concrete. Render cracks when what’s underneath it flexes. If it can’t flex, the render stays put.
The water can’t get through. The back of the blockwork is coated in a polyurethane waterproofing membrane before any soil touches it. Polyurethane stays flexible rather than going brittle, so it moves with the wall instead of splitting — which is why it holds up in a planter where a rigid cementitious coating eventually won’t.
And the water has somewhere to go. The drainage line goes in during construction, not afterwards. Waterproofing keeps moisture out of the wall; drainage stops it pooling behind it in the first place. You want both — and once moisture is moving through render, paint doesn’t stand a chance.
Neither of those shows up in the finished photos. Both are the difference between a planter that still looks right in fifteen years and one that needs redoing.
Size and planting
The run came to 15 metres, at 600mm high and 600mm deep.
Those dimensions weren’t arbitrary. 600 high sits at a comfortable height to work at without kneeling, and gives the bed enough presence to read as a design element rather than a low edge. 600 deep gives roots proper room — important, because of what went into it.
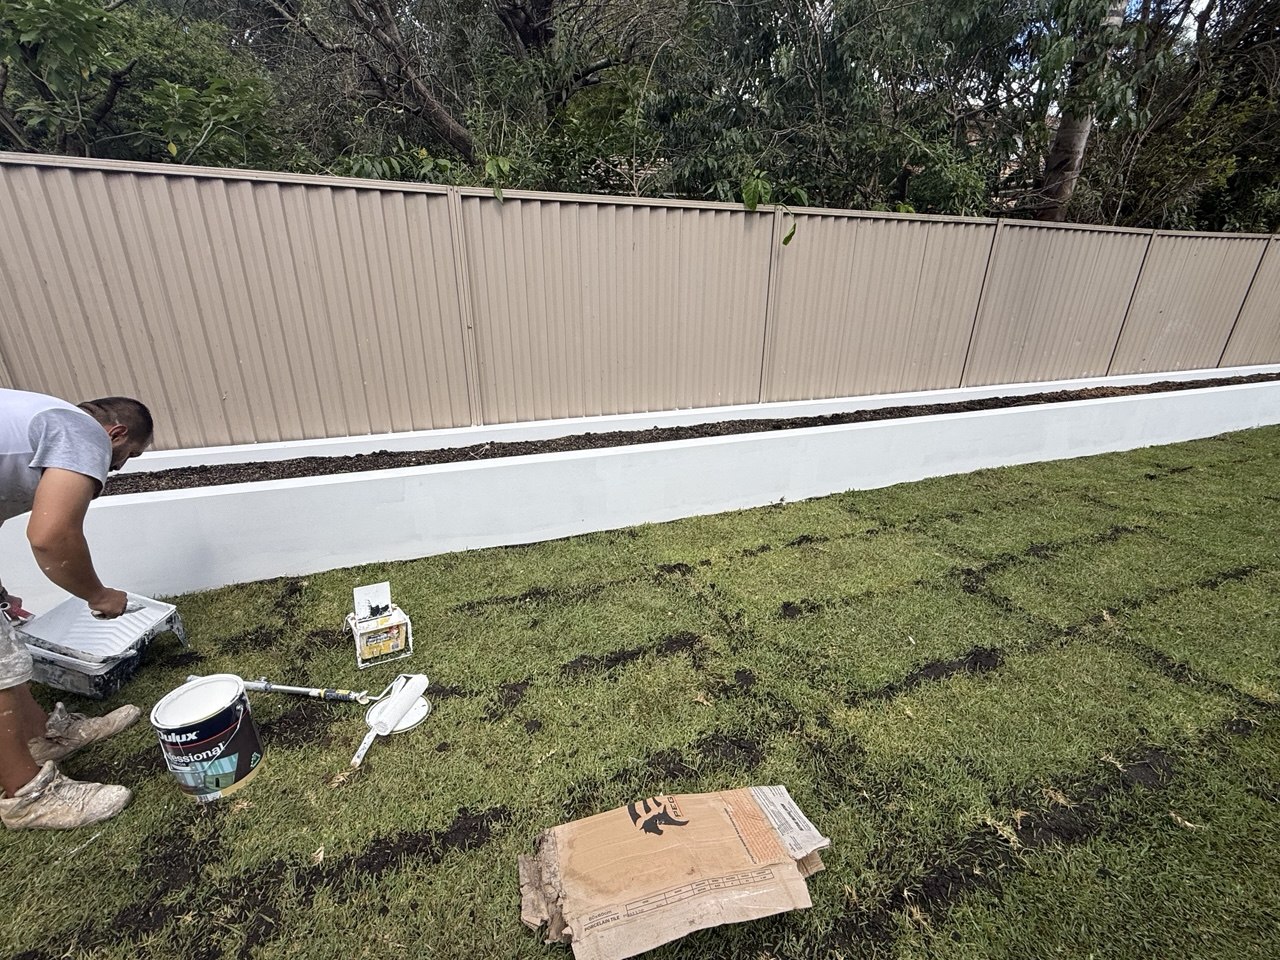
We planted lilly pilly along the run. It’s a fast grower, it takes a hedge shape well, and it was chosen for a specific job: covering the Colorbond fence behind the boxes. Colorbond does what it’s meant to do, but a long unbroken run of it is not what anyone wants to look at from the kitchen window. Give the lilly pilly a season or two and the fence disappears behind green.
That’s the part people underestimate about garden boxes. They’re structure, but they’re also the thing that lets you hide what you don’t want to see.
Project details
- Location
- Eastwood, Sydney
- Length
- 15 metres
- Dimensions
- 600mm high × 600mm deep
- Structure
- Reinforced, core-filled concrete block
- Finish
- High-quality acrylic render, painted in Dulux Weathershield to match the house
- Waterproofing
- Polyurethane waterproofing membrane to the back face
- Drainage
- Drainage line installed through the box during construction
- Planting
- Lilly pilly, for fast screening of the Colorbond fence
The result
The backyard went from bare dirt to finished with one element. The boxes match the house because they’re built and finished the same way, so nothing reads as an add-on.
And because the structure and drainage were done properly underneath, the finish is going to stay looking like this. On a new property that matters — the last thing you want is the newest thing in the yard being the first thing that looks tired.
Want something similar?
Send us a photo of the space and rough measurements. We’ll tell you what suits the site, what it involves, and give you a written price before anything starts.